Showing posts with label frame. Show all posts

Thursday, May 8, 2014

Heel Strike, Warrior Flag4

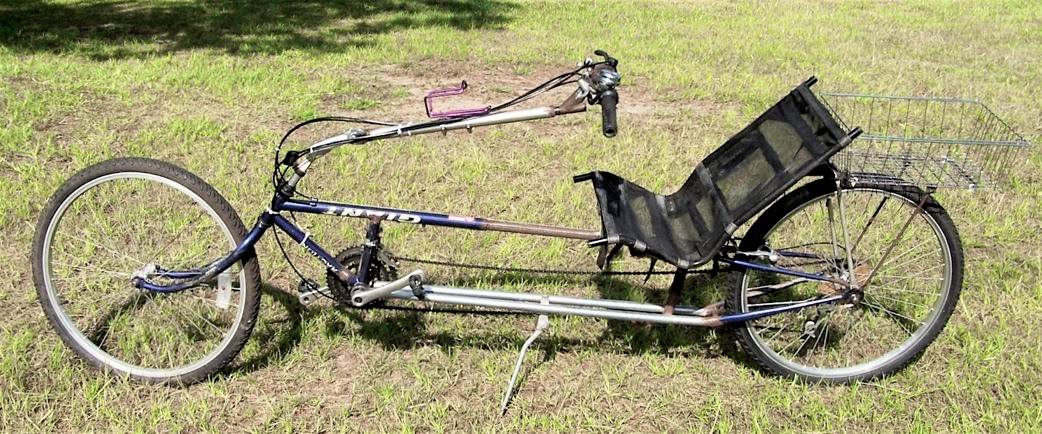
The front portion of my main frame tube was parallel to the ground.  From the top of the tube to the ground was 12".  I found that I was have periodic heel strikes with my size 10 (EU 43) clipless sandals.  I decided to cut from the bottom up the joint where the two tubes are spliced together ... leaving the top weld in place.  The hacksaw removed some metal, then I lifted up the tube so the bottom opening was about 3/16" wide.  That isn't very much, but it resulted in about a 1-1/2" rise to the top of the front tube.  I then brace this with some metal chips, and welded it all back together.  This has pretty much eliminated heel strike.  Other than a short, high, bump (speed bumps).


This is that seam where I cut up from the bottom.

Here you can see that the front section of the main tube rises slightly.

 
The tip of the flag pole is in the same plane as the left front wheel.  Yes, I pulled the support brace in another 7/8".

Friday, February 7, 2014

Chain Drive 1

Okay, so I mounted a chain on the frame with idlers.  Only one gear on the front (the smallest one).  Only gear on the back (also the smallest one).  Took some photos.  Then rolled it out to the flat road out front, then took off riding down the street, turned right into the driveway, and rode down behind the shop.  It moves out pretty good.  I won't really know how well it will actually perform, until I get shifters, shifter cables, brake levers,  and brake cables on it.

In order to clear the tie-rod under the frame, I had to make this adapter.

This didn't turn out very focused ... bottom view of the trike.  I have a 3" idler roller (v-belt pulley) on the rear.  And a 2-5/8" idler roller (v-belt pulley) on the front. 

A view of the steering (trike upside down).  Front chain idler (2-5/8").  Brakes mounted.

Steering turned all the way to the right.  I can achieve these steering angles while riding (without the wheel hitting my leg).

Steering turned all the way to the left.

A view from the front (trike right-side up).  Clip on pedals are a must! (Crank Brothers Candy 2)

Here it is just before I took off riding.  Next addition is the return chain tube, some means to keep the drive chain from popping out of the idler rollers (it kept coming out of the front one), and brake levers & cables.

Monday, August 31, 2009

Angles & Framing

When it comes to framing and angles ...
You shim it up with anything that is handy.
In this case it was a couple of 5 gallon buckets
and some wood scraps ...
as long long as the parts all match up ...

I sure hope I got this angle correct ...
because it is all welded up now and I'd hate to have to cut it apart. I sure wish I made lovely welds like Jack or Brad ... but I don't. Which is a good reason for me to own
a 4-1/2" hand grinder!

Hey, this angle looks pretty good!
One out of three isn't too bad ... :-)

Tuesday, March 17, 2009

Seat Support Update

Notice that this time around, we have clearance for the chain.

Here's the sideview a.k.a profile

Friday, March 13, 2009

Rear Forks

Clamped to weld on rear forks ...

With the front forks, the rear forks, and a couple of wheels mounted, it is starting to look somewhat like a recumbent bicycle ...

Now it just needs dropouts, derailleurs, crank & pedals, A SEAT, handlebars, and a chain.

Saturday, March 7, 2009

Start of Rear Forks

Here the main tube is clamped in the jig.
The black forks on the left will be used for rear forks.
Notice that I cut the head tube off about 3/8's inches below the bottom bearing support. This is so that I can use it for a steering unit in another project. And leaves enough room to weld the tab on it below the bearing to connect to the front forks.

I still have to mark and drill the holes near the rear of the main tube (on your right in this foto) ... and build the block to hold the axle-end of the forks in position when I clamp the main tube on the other side of the jig to weld the forks to it at the proper angle (those two empty "u" blocks over there will hold the main tube with the bottom bracket hanging downward over the right end).

Friday, March 6, 2009

All but the rear forks

Here's the view from head on ...
You can see the front forks (purple), Bottom Bracket for the front crank (silver), the front derailleur post (blue), and the chain rollers (red).

Here's a 3/4 view ...
What's missing are the rear forks at the other end of the main tube.
The plans recommend chromolly tubing bent 90°.
I have EMT tubing, but that didn't seem very strong.
I'm still working on them ...

Here's a right side view ...
the rear forks attach to that left end of the main tube.

Wednesday, January 7, 2009

Fotos for A.D. Carson

A.D. Carson sent me an email requesting some better fotos of the Mach2 ... particularly of the welding on the bottom tubes. The lines of the bottom tubes looks pretty good. My welding is NOT all that great. All I can say is that I manage to stick things together. And use a grinder to smooth the mess out ...

This is where the bottom tubes connect to the Bottom Bracket.
Needs more grinding ...

Topside view of bottom tubes connecting to the rear triangle.

Bottom view of the bottom tubes connecting to the rear triangle.

Side view of bottom tubes connecting to the rear triangle.
I like the way the lines flow without too bulky connections.

Tuesday, January 6, 2009

Mach 2 Update2

I welded on the bottom tubes ...
This is an indoor shot at night so it isn't well lit and I couldn't reall get back far enough to get a good side-view shot.

This is a shot of the front end.

I ground off the stubs and welded the bottom tubes directly to the BB
This gives a cleaner line directly back to the rear.

I did some hacksaw cuts so the tube ends would overlap the portions of the rear forks. This made for a cleaner looking transition. Also tacked the seat tube to the bottom tubes.

Thursday, July 10, 2008

Frame Work

It's 91 Degrees and 88% humidity ... so after getting home from delivering the load ... I decided to go out in the shop and do some more work on the 1st DeltaWolf trike frame ... this is the one my grandson has his eye on ...
I tacked the rear frame onto the main tube ... then measured from a common point on the front of the main tube back to the corners of the frame ... made sure the rear axle was evenly distributed ... and measured from the ends to the common point. Both sides were the same ... so hopefully it will ride okay.
Next, I cut a 16" length of 3/4" EMT tubing (cheap galvanized stuff that I got in the electrical section in Lowe's). After I shaped it to fit the space between the corner of the rear frame and the main tube just above the gusset area ... I cut another piece of tubing to match. I filed off the galvanizing along the ends so it would weld better and not gas me. I clamped the frame in the vice and then tacked the support tubes into place. Now that everything was stable ... I could finish welding the rear frame to the main tube ... and both ends of the support tubes.
You'll notice that I put one of the 20" rims that I laced up on the end of the axle ... I haven't trued it or bolted it onto the axle yet. The axle also hasn't been cut in the middle yet. Soon.
I still have to mull over how I will be attaching the seat to the frame ... it's a fiberglas one that I obtained from S&B Recumbents in Gardena, CA.

Saturday, May 17, 2008

Bolted to Frame

There it is ... bolted to the frame ... needs a few more parts ...

Thursday, March 13, 2008

Trike Progress

Believe it or not, but there has been some progress on the trike ...

The rear frame is completely welded ... it bows slightly (the open ends point slight inwards). I had to make the middle pieces 1/4" longer because the plans call for using 1-1/2" tubing ... and I made the mistake of getting 1-1/4" tubing ... and then cut the tubing specified for the lengths for the bigger tubing. Oh well. So, lots more welding, grinding, and re-welding.

I completed and welded on the gusset under the seat tube area ... put a 3" metal pulley on there (found cheap at Lowes) ... the grandkids will just have to live with the extra noise ... and not being confident about the joint between the main tube and front tube ... I welded a strip of re-enforcing metal to strengthen that. And I stuck the front forks on just for fun.

I did cut 3" off the length of the seat tube ... because I intend to put 20" tires on the rear ... and a 16" tire on the front.

I'm making plenty of mistakes on this 1st one ... by the time I get to the 3rd one, I should have a good trike for myself.