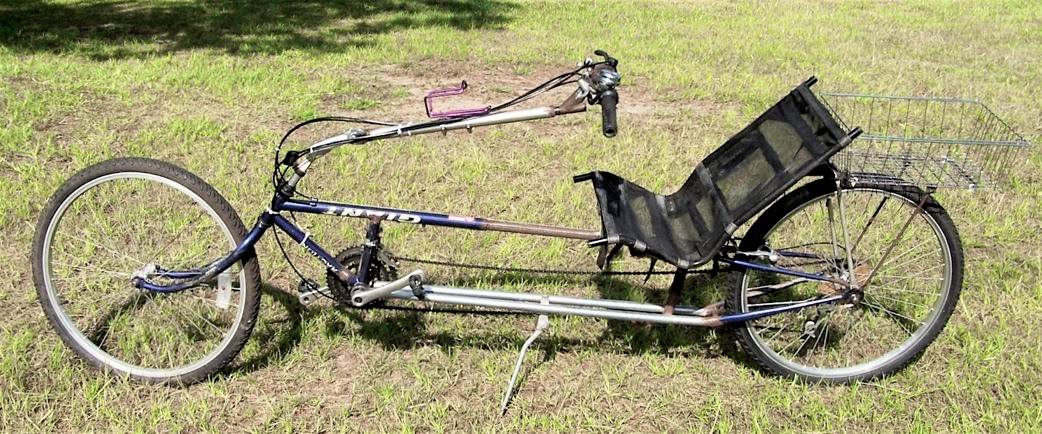
Okay, so I mounted a chain on the frame with idlers. Only one gear on the front (the smallest one). Only gear on the back (also the smallest one). Took some photos. Then rolled it out to the flat road out front, then took off riding down the street, turned right into the driveway, and rode down behind the shop. It moves out pretty good. I won't really know how well it will actually perform, until I get shifters, shifter cables, brake levers, and brake cables on it.
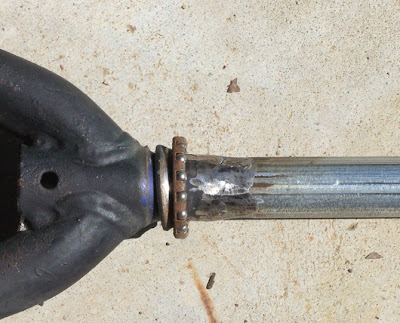
In order to clear the tie-rod under the frame, I had to make this adapter.
This didn't turn out very focused ... bottom view of the trike. I have a 3" idler roller (v-belt pulley) on the rear. And a 2-5/8" idler roller (v-belt pulley) on the front.
A view of the steering (trike upside down). Front chain idler (2-5/8"). Brakes mounted.
Steering turned all the way to the right. I can achieve these steering angles while riding (without the wheel hitting my leg).
Steering turned all the way to the left.
A view from the front (trike right-side up). Clip on pedals are a must! (Crank Brothers Candy 2)
Here it is just before I took off riding. Next addition is the return chain tube, some means to keep the drive chain from popping out of the idler rollers (it kept coming out of the front one), and brake levers & cables.
Showing posts with label steering. Show all posts
Showing posts with label steering. Show all posts
Friday, February 7, 2014
Chain Drive 1
Labels:
brakes,
clip-on pedals,
Disc Brake,
frame,
seat,
steering,
test ride,
USS,
warrior trike
Wednesday, January 22, 2014
3 years later - Warrior Trike
I'm finally working again on the warrior trike. I had to make an adjustment in the right front arm. The bottom of the right front wheel was too far in. After that, had to work on the steering and brake support mounts.
This is a view with the frame standing vertical so you can look at the steering from the bottom.
These are the paper and wood mockups that I made before making the metal brake-support mounts.
Trying out the wooden support and adjusting it to sit flush ... before using to model the metal support.
From the bottom view, this is the brake on the left ... after it was cut off and re-welded on the first time. I had to cut it off, adjust position, and re-weld a 2nd time so the disc wasn't hitting the brake with those high points.
From the bottom view, this is the brake on the right. It was re-welded twice as well ... for proper disc placement. I'll take a final photo of them later.
A rolling frame with foam on the wooden seat. No chain, brake levers, or cables. So, next up is the drive train (chain, derailleur, idler pulleys ...).
Friday, April 1, 2011
Steering Headset
Foundation for the cargo section.
The top tube fits the headset cup. But the headset extension tube is larger in diameter than this tube ... so I cut a piece of 1/2" EMT tubing and split it down one side, cut across to make two pieces, then spread them open to make 1/2-moon pieces to go around and shim the larger tube. This centered the larger tub inside the headset extension tube.
Looking down inside the headset extension tube, you can see the end of the short piece of tubing that the cup fits into.
Looking from the side ... what you can't see are that the shims were even with the top of the headset tube extension, while the inner tube protruded 1/8" above. I then welded the inner tube to the outer tube. And tapped the cup into place. This allows for replacement of the cup and bearings as they wear.
This is the extended tubing for the headset.
It was cut, and a 3/4" EMT tubing was welded in between the two pieces.
Upper end
lower end.
If you can differentiate it from the parts in the background ...
There's the frame temporarily on wheels.
Another view from a rearward angle.
Gotta work on steering rod and brakes next.
Friday, December 4, 2009
Steering 1
Wednesday, November 4, 2009
Steer Arm
Friday, May 22, 2009
More About Steering

The seat tube clamp is not attached in any way to the tubing. I did cut 4 slots in the tubing so it could be clamped down tight on the stem that you see below. You have to tighten the bolt really tight to keep the tube from wiggling back-and-forth on the stem.

Once upon a time ... there was an angled section attached to the side of the stem ... which went forth and clamped to the handlebar. I cut that off with a hacksaw and ground it smooth. I inserted this like normal into the headset, tightened it really tight (doesn't matter which direction this faces ... only you will know what's under the tubing), then slide the tubing down over the stem top to the headset nuts, and clamp it (making sure the handlebar is perpendicular to the wheel).
Thursday, February 12, 2009
Not Much Different ... But Changes
 The Mach2 doesn't really look much different from last time ...
Still waiting on cables ...
Having ridden it several times ... I made some small changes
that are important to me.
 It seemed like a good idea that the steering could be moved up and down ... But after riding it several times ... all that movement really irritated me. So, I pulled out the delrin (plastic) plug and cut the middle out of some funky handlebars. This foto shows that piece welded in where the delrin used to be ... and clamped solid at a good ride-able height. Just one less moving thing ... and it rides better because of it.
 Even though the seat support bracket was hose-clamped to the main tube ... it tended to rock from side-to-side. If you off-balanced, it would roll to the side (like a horse saddle that wasn't properly cinched) ... and down I'd go. I centered it where it felt right ... then tack-welded it at the corners so it wouldn't move anymore. Way much better!
Saturday, January 24, 2009
Mach2 - latest changes
 At this stage ... I have a different fork on the front ...
Not sure if it is raked too much ... have to ride it and see.
I used an adjustable angle pyramid neck.
And I stuck a seat on it.
I need to throw a few more parts on it, ride it, and see what to do next.
 Rather than 90° bending a tube ...
I heat bent a "U" which connects thru a delrin plug/tube.
That's a 1" EMT tube welded to it.
Monday, September 29, 2008
Closer View of a Few Parts
That's a seat tube that is attached to the piece going into the headset.
This sits high enough to clear even my knees.
This sits high enough to clear even my knees.
Steering Complete
Saturday, September 27, 2008
Steering Progress
 I'm making the Above Seat Steering (ASS or OSS) mechanism. This thing has 2 headsets ... one above the front fork ... the other in front of the seat. They currently are linked by a rod (which I borrowed off my lowracer). When the rear one is turned ... the front one turns simultaneously in the same direction. Monday I'll work on the short riser that connects with the handlebars. I'm also working on a different bottom bracket unit. You have to cut up multiple bicycles to get the parts you need to make one of these ...
Grandkid DW Trike - Steering
Subscribe to:
Posts (Atom)


