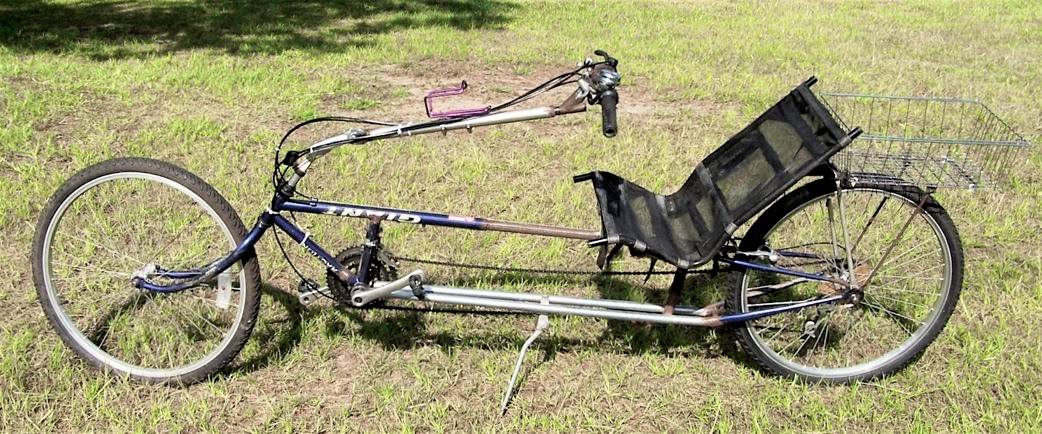
Tuesday, December 28, 2010

Rear Section

Needing a rear section, I cut this out of a cheap mountain bike.

I think that I will use it at about this angle.
My concern is the angle of the seat tube.
Now I need tubing to make the box.

Monday, December 27, 2010

Cargotrike Plans = Cargo Trike Plans

All of the above measurements are in centimeters (cm)

The approximate inch (") measurements are: 
88 cm = 34-5/8"  (35)
127 cm = 50"
208 cm = 74"
50 cm = 19-11/19"  (20)
36 cm = 14-3/16"  (14)
62 cm = 24-7/16"  (25)
85 cm = 33-1/2"  (34)

The numbers to the right i.e. (35), are what I'd probably round the inch measurements off to.   That's what happens when you don't have a nice metric tape measure ...
Here's another view of a cargo-trike frame without the box
Of course this is a modern one with 20mm axles ...
it takes something heavy-duty like that to only support the axle on one end. 

To build one of these, the simplest would be to use a single-speed bike (donor, trash, or thriftstore) with a Bendix brake on the rear.  Cut off everything in front of the Bottom Bracket (BB) -- that's the part where the crank connecting the pedals goes through the frame.  And everything in front of the seat tube.  That leaves you with a rear triangle, seat tube, and bottom bracket all in one piece.  The cargo box and new main tube (which you will make) will connect to the front of the BB.

I decided to start on a cargo trike.  I needed something for the box out front to pivot on ... I looked at headset bearings and decided they were just too small.  So I cut a large bottom bracket off a bicycle that has a single-piece steel crank.  I cut most of the crank off on the side with the sprocket gear ... leaving just enough to hold the gear in place.  I figure to tack a thin metal plate to the single gear.  And that will then bolt to the frame of the box.  (see 6/17/11) Once I'm done welding the plate to the gear, I'll cut off the left-side crank leaving just a nub.  That should give me a good sized bearing.  And it will be serviceable ... to re-grease the bearings and change bearings & cups.

This unit will be the pivot base of the cargo box.
The box frame will bolt to the gear unit.

The steel tubing will be welded to it ...
the other end of the tubing will be welded to the BB on the rear of the bicycle.

Saturday, December 18, 2010

Christiana Cargo Trike - Other projects have had priority ...

Most bike builders do their work in the summer.  Mine has actually been moved to the winter when it is too rainy to work on outside projects.  DMV has grounded my wife for awhile, so I am considering making a cargo trike that she can ride to the local store.  Something along the lines of a Christiana trike.

I'm thinking of using a bottom bracket from a single-piece crank as the pivotal foundation for the cargo box.  And attach that to the end of of a large square tube running from the BB that the rider pedals.  Although that round handle is nice, if you had more than one-speed, how would you replace a broken twist-grip shifter?  I'll have to think about that when I get to that point.  I think I'll start with the box frame and the rear frame and see what I have to do to connect them together.  :)

Wednesday, August 4, 2010

Current Ride - Foldable


Fortunately it folds down so I can slip it into the back of my car.
It's a 7-speed ... notice the rear derailleur.
Bought it online at the following website:


So, this is my current ride ... most days.
Since most of my riding is with kid clients.

Thursday, July 29, 2010

Summer 2010

Now that the summer is half over ... it's about time to start doing something with that corner of the shop.  It's a bit overcrowded with bicycles.  :-p

Thursday, March 4, 2010

Winter Hibernating

The Warrior Trike is hibernating in the shop ...
pending further work when the weather and motivation
warm up ... :-)

Friday, December 4, 2009

Steering 1

The frame is upside-down in this foto.
I've tacked on the steering headset
for the Under-seat steering.

Ugly ... but it sticks.
Had to jack up the amperage for this.